
September 9, 2026
To add a user profile on MyAccount, you’ll need to log in to your new portal.
Please note, this will not allow the user to discuss the account if they need to get in touch with us. Please click here to see how to update your account contacts
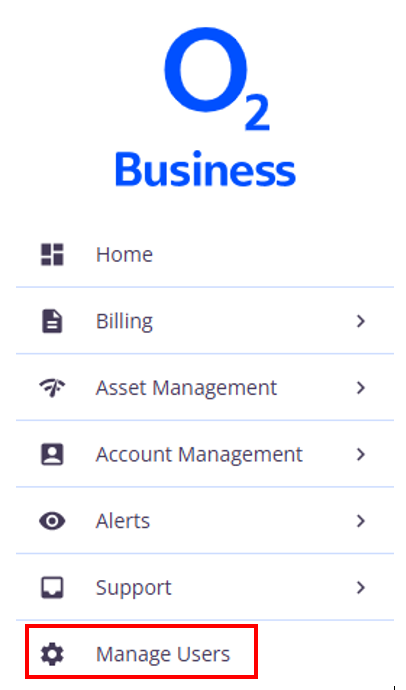
Once you’ve logged into your account, navigate to the side menu and click Manage users. You’ll find this button at the bottom as shown below.
You’ll then be directed to the Manage users page. Navigate to the top right-hand corner and click the ‘Add user’ button.

This will take you through to a form to fill in the new user details.
See the ‘Field information’ section below for help with filling out these fields correctly.
Please note: the email address provided should not already be on the account.
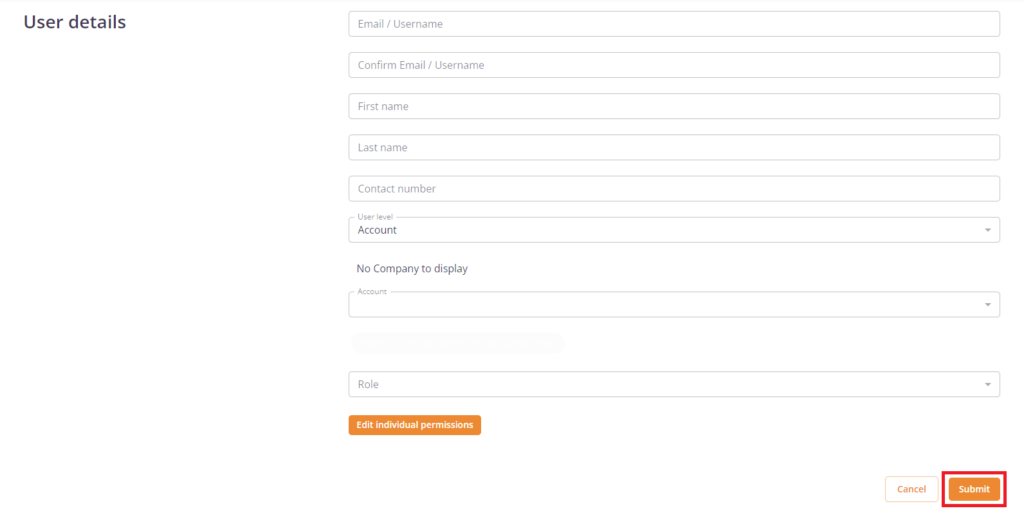
Once you’ve completed the form, click Submit. The new user will get an email prompting them to complete the registration process.
Field information:
Please use the information below to help you complete the User details form.
- Email address – the email address will be unique in our authentication system. This means you can’t use the same email address twice in the same group/organisation. When adding an existing user to another group, the user will have access to the new group using their existing credentials, but their access and permissions will remain independent
- Name, contact number – these are properties of the user and are therefore shared across all instances of the user. If the user has access to more than one group, updating these fields will update their name/number on all other groups too
- User level – this displays the level of access the user has. Users will have access to levels below them but not above them. For example, a user will have access to all sub accounts in whatever account(s) they have access to. The options reflect your own access level, so if you’re an account user you won’t see the group and company options.
Options include:
Account
Sub account - User access – depending on the option selected in user level, more fields will display to define what the user has access to. For example, if you select account, you’ll then need to define which account(s) the user can access
- Role – the role the user has
- Edit individual permissions – this will reveal the permissions section
